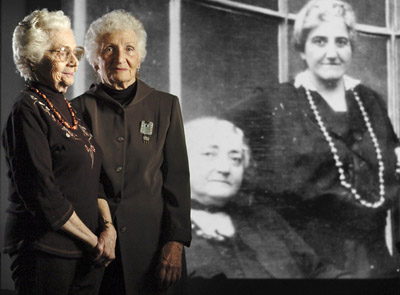
 Here is the photo that I built the DIY softbox grid spot to create. The key to this photo is total control on the "white" background.
 The photo was done to illustrate a story about two sisters. One had written a play about the surviving Cone sister (major historical benefactors of the Baltimore Museum of Art) and the other was playing the lead role. I wanted to connect them to the actual sisters by joining them with a historical photo.
The light setup is pretty straightforward, with a couple of curveballs.
The softbox was from camera right - and far enough away so that it was out of the frame. I needed compositional area to the right to include the background photo.
The (camera left) back/rim light was a in a normal reflector through a grid spot. I was in the studio with a softbox, so I gave my White lightning Ultra 600's their semi-annual airing out.
The digital projector for the historical photo was behind the softbox, projecting towards the center of the background.
I could have done this with SB speedlights, but I would have needed a flash bracket for the softbox, which I did not have.
Remember, I am using continuous light on the (DLP-projected) historical photo on the background, so that was the only continuous light in the darkened room. No modeling lights allowed on the flash.
The thought process is like this:
1) You have to get your main light(s) positioned and controlled such that no light will spill onto the white background. You want that tone to be absolutely black before the continuous light source adds the background photo to it. (The starting tone, if not black, will be the darkest possible tone in the background.)
 2.) Check your strobe light (only) to ensure that you have no background contamination. Dial in your flash's power to give you just enough aperture to hold the background to the focus level that you need. Overdoing this will unnecessarily lengthen the exposure needed to "burn in" the continuous portion of your exposure, leading to motion-ghosting problems with your subject.
3) Now, set your camera to that aperture, and turn on the projector. Adjust your shutter speed for best background exposure.
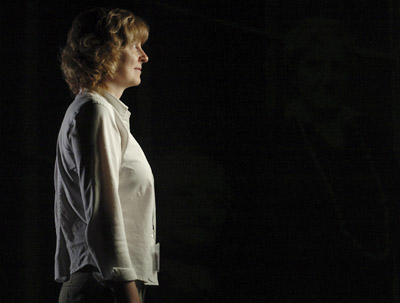
4) Bring in your subject and turn on the modeling lights for focus. With everything adjusted and locked down on a tripod, kill the modeling lights.
5) Shoot away, and monitor your pix on the back to fix any problems.
Can this be done in Photoshop? Sure.
But I always default to doing something "in-camera" if I can. I think it is better craft.
As for the DIY softbox grid spot, cardboard and tape once again defeats the photo gear mafia. And I save a few hard-earned clams.
Next: Medical Illustrator


0 comments:
Post a Comment