About six weeks ago, I posted an article about how to make a darn-near free macro studio. I included photos of a flower/phone/radio/etc on white poster board.
What I saw afterwards was (mostly) a lot of small things on a white infinity sweep. But the point of the little el cheapo contraption was that it could be used to create many different lighting schemes.
So today, I wanted to do a shoot using a the same type of lighting box to get a completely different look. This is the typical type of thing you might need to shoot for a quickie product shot, to throw some shiny new gizmo up on your blog (in style) or for an eBay auction.
In case you forgot and missed the link above, here's how to make it.
For this shot, we'll be isolating the subject by using a black reflective surface. You might think a mirror would be better, but you'd be off base. A mirror reflects from the rear surface, unless it is an expensive and fragile "front-surface" mirror. So there would be a double reflection from this oblique angle.
Today, our gizmo will be sitting on 144 square inches of polished black granite, courtesy Home Depot's tile aisle.
Total damages: $5.49.
Gotta love scoring photo gear at The Big Orange Store.
The polished top surface will reflect the background nicely if we shoot from a low angle, allowing is to light the subject and everything else on two different planes.
This is pretty cool, as the subject is resting on something that can now hold a tone or color completely different from what would happen if the camera were sitting on, say, poster board. You'll want black, so the tile's color won't bleed through.
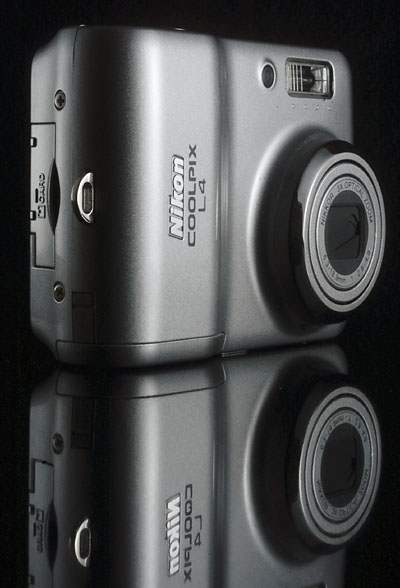
At top is a vertical photo of a Nikon Coolpix L4, which is my wife's garden-variety point-and-shoot digital camera. I chose it as a subject because it is reflective (which can make something more difficult to shoot) and has a complex surface.
I am going to walk through a series of photos, explaining the changes that lead to the progression of looks.

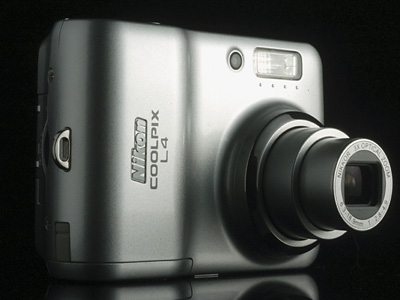
First off is a swap from vertical to horizontal orientation. And I figured it would be better to have the Freudian part extended for the shot, too.
The first stab at this is with a light coming in each diffused panel pretty equally.
You can adjust the lighting angle by rotating the whole box under the subject by up to about 30 degrees in either direction. Then simply turn the subject to compensate.
I like the way the left light defines the left side of the camera, making it look three-dimensional. But I have plans for the second light. So I have to illuminate the left side some other way.
This does it with one light on the right, and a fill card card (a folded piece of white paper) placed just out of the frame in the camera-left front of the subject.
A little counter-clockwise rotation helps me to pick up the reflection of the right diffusion panel in the front of the camera lens at right. Which now proves that there is, in fact, glass in there. Better than the black hole in the earlier frame.
So, now that I am doing all of this with one light (an ugly, hard light before we gussied it up) I am free to play with my background with the second light.
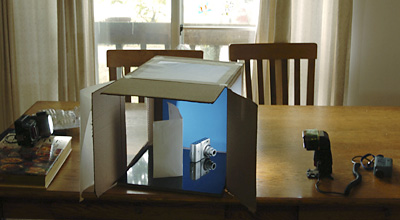
Here's a wide shot showing the overall look after adding a sheet of cheap blue craft foam (coulda been paper) for a background.
Total damages: $0.59 at local craft store.
Note that the diffusion is out in the left panel. I have the left flash dialed way down and it is lighting the background directly. You see the fill reflector piece of paper here, too.
It is important to mention that I could have done this with two plain old desk lamps, too. Just balance to tungsten, tripod the (shooting) camera and move the lights in or out to alter the lighting ratio.
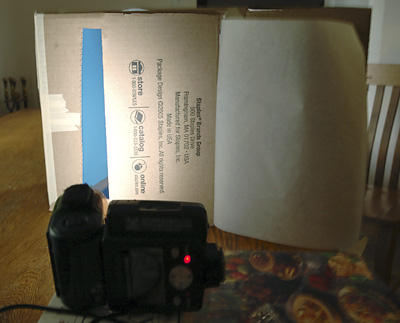
We keep the background light from contaminating the subject with a piece of cardboard as a gobo, as seen here. The aiming is easy if you sight it from the direction of the background light, which is also what I did for this explanatory shot.
No modeling lights needed. Just use line of sight.

So, here's the effect with the background light added. Blue always connotes tech to me for some reason. But you could use anything.
IMO, this is fairly nuanced light for two small sources, a piece of tile and a cardboard box.
This little light box is a frugal, felxible, go-to piece of gear that works as well for small-product catalog shooters as it does for eBay'ers.
Long story short, if you are willing to learn to play with the $10 DIY Macro Studio, it'll earn its meager keep by delivering small object photos with impact.
Next: How To Light A Comet


0 comments:
Post a Comment