
Okay, now is where things start to get a little more interesting. Let's talk about your first "light modifier."
An umbrella will almost certainly be your first light mod. (It is included in the jump starter kit, if you presently have one on the way to you.) Think of your flash as a very brief-but-powerful flashlight. And like a flashlight the business end of your flash is only about two square inches in area.
Thus, while it gives out a lot of light instantaneously, that light is very harsh. To some degree, that may be why you previously have been unhappy with your flash photos.
An umbrella takes your harsh flashlight and essentially turns it into a window. Except we are talking nice, soft window light that you can position and control—in intensity, in location, in angle, even in the color of the light itself.
Photo umbrellas are cheap, portable and super useful. Which is why you'll want want an umbrella as your first soft light source.
There are two general kinds -- the reflected umbrella and the optical white shoot-through umbrella. I strongly prefer the white (shoot-through) version as it is more versatile. In particular, because you can bring it right up next to someone's face for both power and softness.
If you are going with the compact light stands, you'll probably want a 43" shoot-through umbrella, which is pictured above. It folds down to about 14" so it transports very easily along with your compact stand. You can ball-bungee it to your strapped stand and have a nice, transportable light kit.
They are cheap (less than $20) small and easy to transport. Because of the telescoping shaft, they can be a little fragile. But use care, and they will last.
I used to use the reflected umbrellas (they have a white or silver lining and a black backing) but I almost never do any more. I pretty much stick to the shoot-thru's 99% of the time, which is why we chose the white shoot-through model for your starter kit.
__________
Now, let's look at how to use them. (Ahh, the new gear finally begins to transition into technique—and results!)
 Shoot your harsh flash through an umbrella and you get softness and control. Stick it in close and you get light that is tailor-made for portraiture.
 This is a very simple way to make your mugshots look more like they were shot by a professional and not by someone from the Department of Motor Vehicles. With a short telephoto, and umbrella'd strobe and awareness of your ambient light, you can make any headshot look more like a cover shot.
Back it up a little bit, and your new "portable window" can also light some of the environment:
It is safe, classic-looking light that is easy to tote around. Total no-brainer in the bang-for-the-buck department.
In the photos above, the umbrella is being used from what can be considered to be a "classic" position -- 45 degrees up and over to one side. There's nothing wrong with this, and it is probably how you will start out using the light source.
The danger is, you don't move past that and your photos start to all look alike. That is the blessing and curse of an umbrella -- it is easy to look good with it, and it is a very safe light source.

But, as seen above, umbrellas also can be used to create more unusual and dramatic light. And that's where I like to hang out now.
The portrait of cellist Caleb Jones is a great example. (Click here to have that assignment -- including a behind-the-scenes video -- pop up in a new window.) We were flying the umbrella just over and behind his head. By doing that, we created a light that was less predictable, and more ethereal.

An umbrella on a small light stand is light and portable enough to be flown over someone by using an assistant as a "voice activated light stand". This gives you all kinds of opportunities for different lighting directions.
Work the angle. Try different orientations. Get out of the 45-degree rut. You'll be surprised at what an umbrella can do.

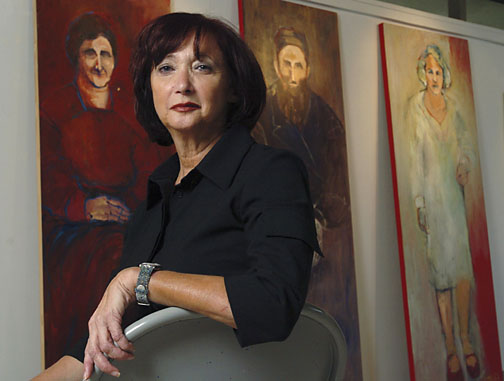
Take this portrait of Pat Morrissey, above, shot in Edinburgh.
By flying the umbrella out over him (but, unlike the cellist, slightly in front) we create a more mysterious "character" light. You can see the location of the light by looking at the reflection in Pat's eyes.
Again, atypical position for an umbrella light. But, I think, more interesting than the standard "45."

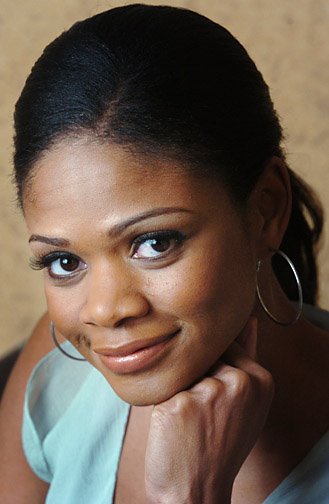
For Dancer Kassi Mattera, above, we took an opposite tack. The umbrella is being used not as a key light, but as a "fill" light. (Don't worry, you'll learn more about multi-light setups soon enough.) The umbrella is coming from below. It is actually positioned on the ground in front of her:

Not typical, but interesting. That umbrella is filling at about two stops under the main exposure level. Kassi is being lit by another, hard light source at upper right.
The umbrella, on the floor, is bathing Kassi in soft, "bottom light" and keeping all of the hard light's shadows from going to black. (Click here to see a full run-thru of this shoot in a new window.)
Long story short, umbrellas are a great choice for a first soft light modifier. But even better—and if you allow yourself—you can grow with them and get into far more interesting light.
__________
Next: Bouncing off of Walls and Ceilings


0 comments:
Post a Comment