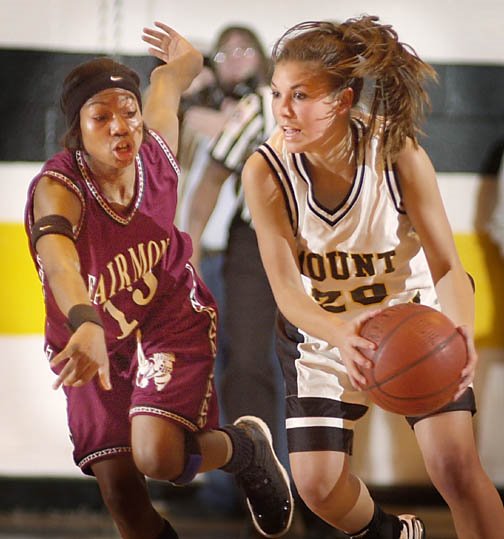
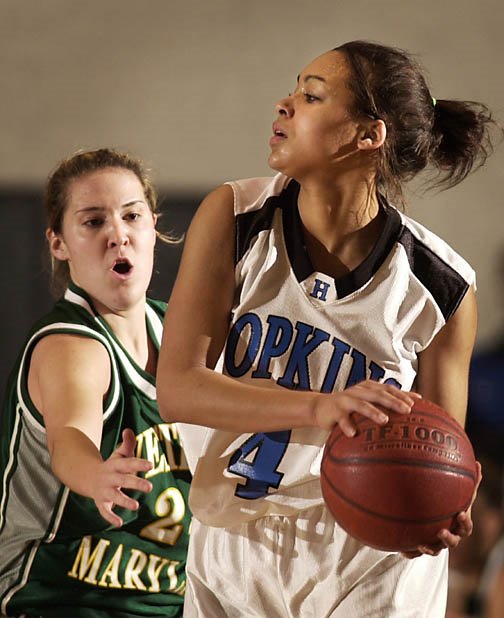
 There are lots of ways to use strobe to improve high school sports. And typically, nothing needs improving more than dimly lit high school hoops.
The gyms are often black holes, with ambient levels as bad as 1/125 at f/2 at 1600 ASA. Not even a speed lens and a hard ASA push is gonna help much there.
On top of that, there are hot spots and cold spots. And the sadistic architects seem to like to keep it nice and dark right over the rim for some reason.
I have evolved from shooting (un)available light, to direct strobe (ugh) to nuking the ceilings with White Lightning Ultras (find an outliet and hope no one knocks over your strobes.) I have even shot at 250 at f/2.8 at ASA 1600 and bounced a Vivitar 283 (at full power manual) off of the high ceiling (!) which has gotten me out of some dark situations.
But what I have been doing for the last few years is to cross light with a pair of shoe-mount strobes stuck up in the bleachers.
Lighting half of a gym is a lot to ask from a pair of SB's. So I am not overpowering the ambient, so much as finessing it.
This is not a bare-bones lighting setup, as far as cost is concerned. I use two shoe-mount strobes on Bogen Superclamps, high voltage Lumedyne external battery packs (because I am shooting lots of frames at half power) and trigger them with Pocket Wizards. Synch cords would be completely impractical in this situation. The point is to show you what you can do with a pair of SB's.
Here is the technique.
I am lighting half of the court with the two strobes. I can light the other half with two more - very easily - for a full-gym lighting setup with four shoe-mount strobes. (I will get to the front-court half of the four-light setup in a subsequent OA article.) But I typically shoot opposite end hoops with prep basketball. Typically, you need coverage at both ends for college and pro, when you need the picture. Prep, you usually need a picture, so long as it reasonably fits the outcome of the game.
This is a good example of both the "cross light" and "long-throw hard light" techniques we talked about in Lighting 101. It works because we are not working too much above the ambient, which is now providing the fill.
The lights are going to be placed (with Superclamps) above the middle of the bleachers, one on each side. There is something to clamp to above the center of the bleachers about 95% of the time. Railing, metal pipe - something. Even conduit, in a pinch. If there is nothing there, you will have to improvise (and tell me how you did it.) And don't clamp too tightly on electrical conduit, by the way. Use common sense on any clamping support.
The flashes are going to be set on manual at about half power. If the lights are typical sodium vapors or florescent (it'll almost certainly be one of the two) set your camera on florescent and green your flashes. It'll get you pretty close in either case. And besides, the ambient is only acting as fill.
Set the flashes to the 50mm zoom setting. You want a balance of coverage angle and ability to throw the light. You may be able to get away with a 70mm flash zoom setting for more efficiency. But you will have to experiment.
Aim the lights to a point about ten feet in the air above the top of the key.
The strobes should give you a pretty honest f/2.8 at your highest synch speed at ASA 640. If they are hot, turn down your ASA. If dark, vice versa.
This will be at about 2-3 stops above the ambient, but you are working at (pretty close to) the right light color anyway. So no worries - it's all fill. The light will be crisp, but you will be able to read the shadows just fine.
The light will cover about half of the court. If you are following both teams, stay at one end for the whole game and shoot cross court with an 80-200 or a 300. If you want, you can shoot from the sideline about a third of the way up-court, too. If you are following one team, just go up and re-aim the lights from the same positions at half time.
With a little practice, setup is less than 10 mins and teardown less than 5 mins. If I have 10 minutes to shoot a game on early deadline, I will absolutely use the lights. Even though I will only get 5 mins of shooting time (and the other 5 mins as teardown time) I will have more quality choices to choose from with the lights vs shooting all 10 mins available or on-camera.
Experiment with your power settings and angles. Use the warmup time to shoot and test.
You will be very happy with the quality of the light compared to anyting you can do on-camera.
Next: Taming Harsh Sunlight


0 comments:
Post a Comment